Tuesday, August 30, 2011

Somthing for the Garden...

Need a "Thank You" gift for someone special?
Why not give them a gift for their garden....


In my life I have been blessed with a handful of friends who
are always doing "Something Special" for me.

Friends that don't wait for you to ask, they just offer.
Do you know the type of friend I am talking about?

My Friend Sharon is one of  those friends.
She has really blessed me my offering to help me
 with my bedroom makeover.
I decided to paint all the furniture rather than buy new furniture.
Painting is her talent.
She recently helped me
and I wanted to let her know
 how much I appreciated her help.

I decided to make her a piece of garden art....


I have quite a stash
 of glass pieces I have collected to make my little treasures.


Vases....
Plates....
Wine Decanters....
and Votive Holders
were all used to create this garden art.


In addition to the glass garden art
I decided to put together a basket filled with little gifts...


I wrapped it with a pretty plaid ribbon bow and it was complete!


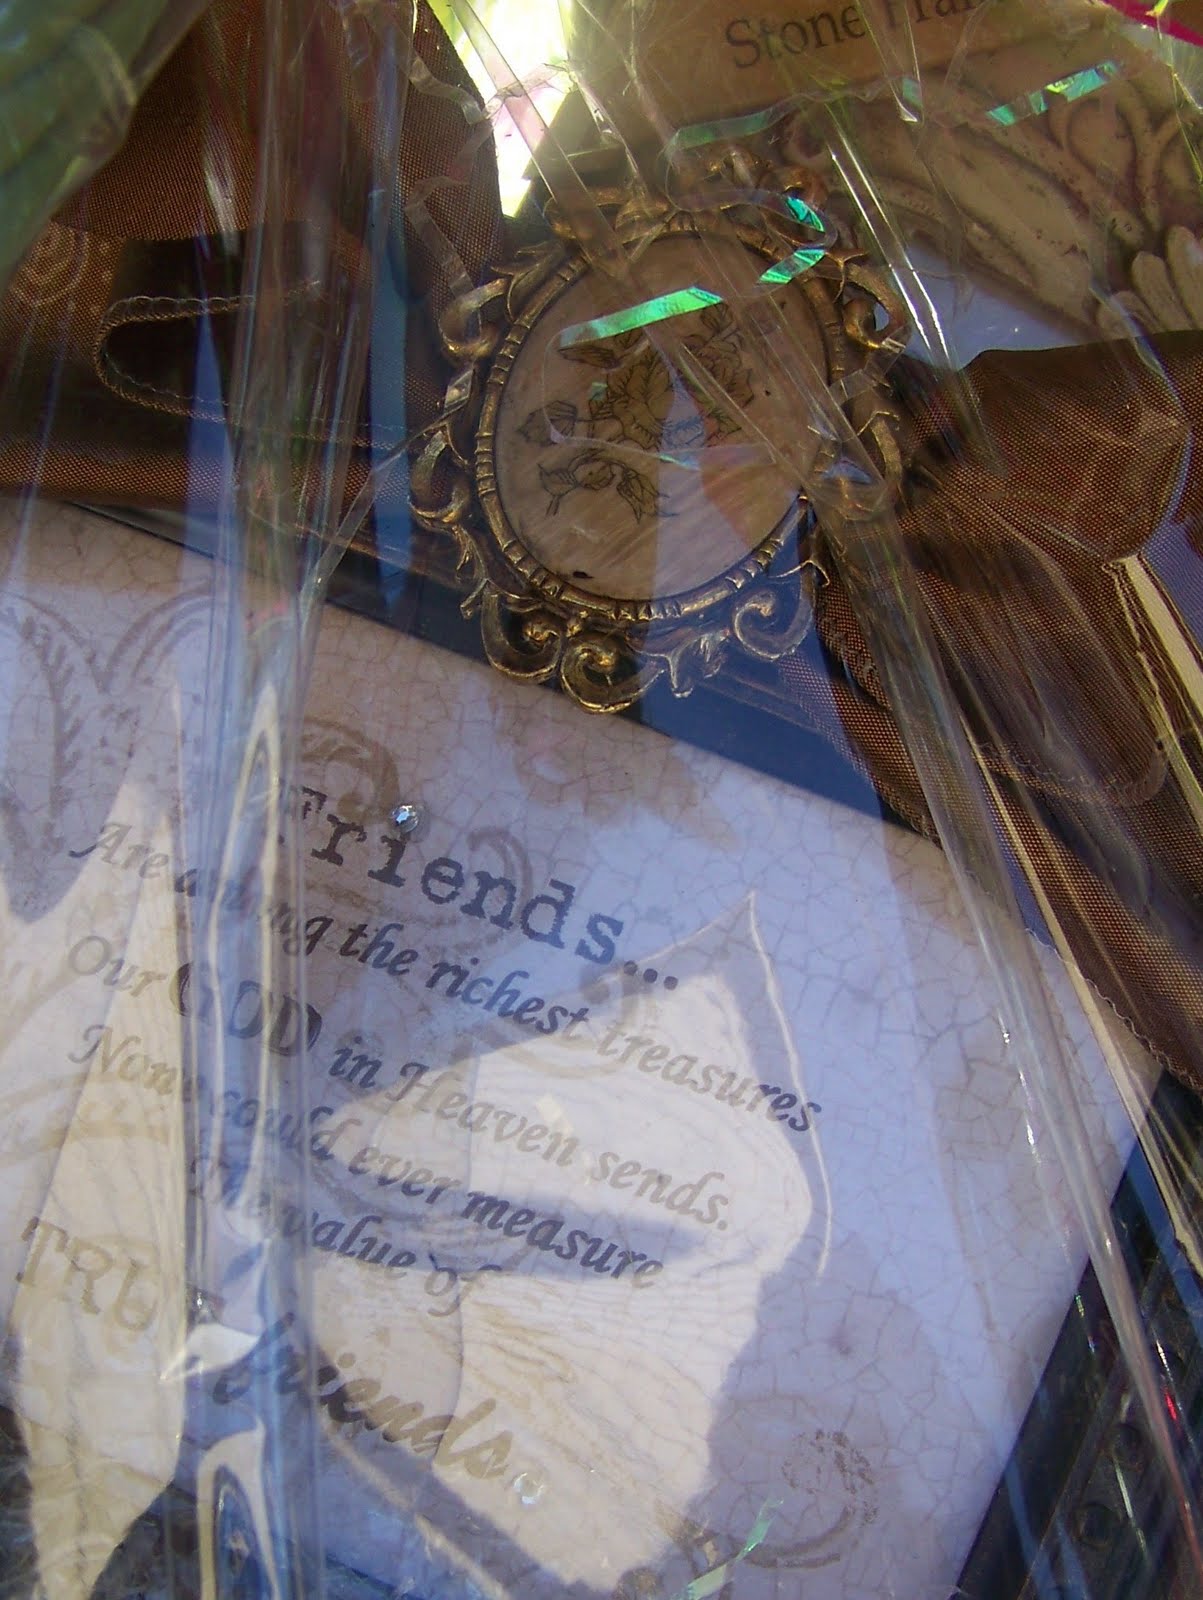
I made a frame with a special saying about "Friends". 
 The frame had a pretty ribbon on it.
  In the center of the ribbon I used something special.

Awhile back, Sharon had given me a bunch of cameos
 her mother-in-law had hand painted.
At the time she gave them to me, she said,
"I know you will put them to good use".

One of these cameos was the perfect thing to add to the frame.


Here's a closer look at the cameo.

I hand delivered the gift.
When she saw the piece of Garden Art
she knew exactly where she would put it.

Right by her RED front door!


It warms my heart to see it displayed in her garden.


Life has many blessings.
One of those blessings are wonderful friends!

I'll be linking up to....

Thursday, August 25, 2011

Add Some Nail Heads to a Cornice...

Looking to add some extra detail to a window treatment?
Recently I completed a drapery job for a client.

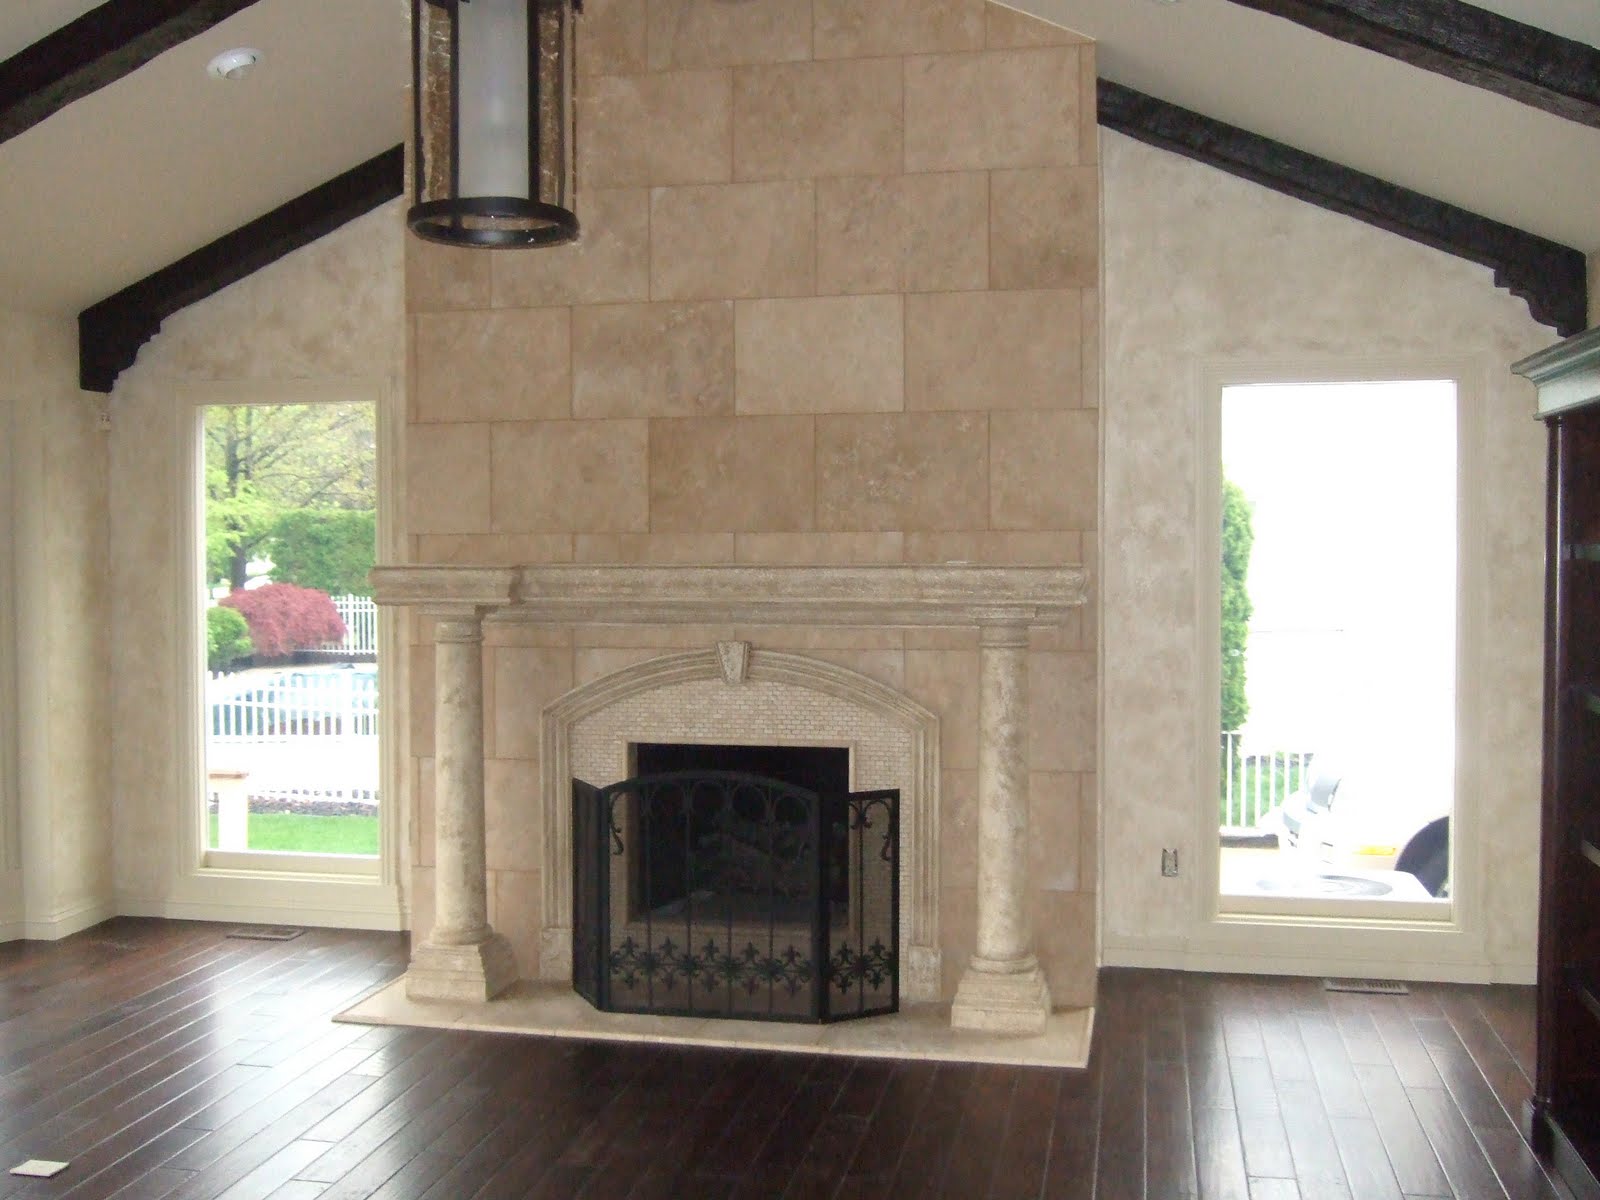
Here's the before photo...


And Here's the completed job...


The great room had just recently be redone.
I was called in to soften the room with fabric.

What to do?
It was a large room with some heavy elements....

I designed window treatments and custom pillows
that fit into the room perfectly.


Here's another view of the large window that needed
some accessorizing with fabrics.


The windows on either side of the fireplace
 were flanked with window treatments
 that had some extra special detail.

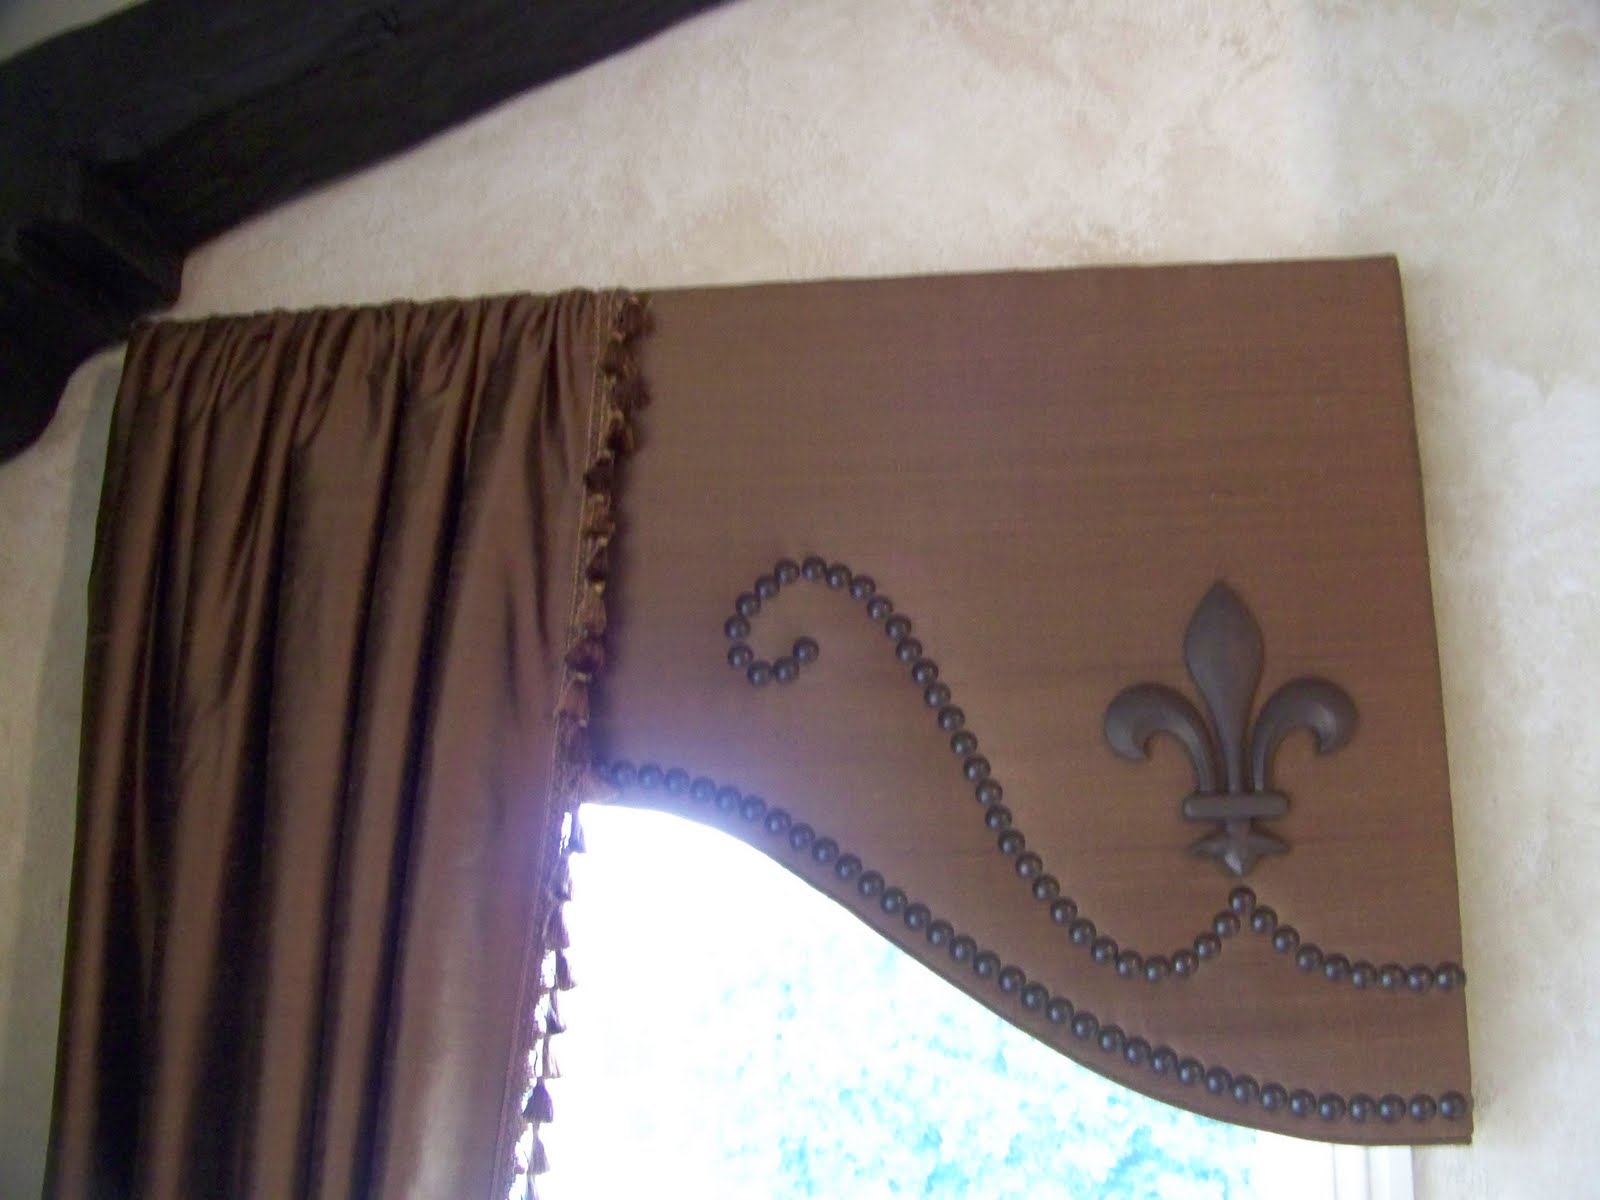
Sometimes just by adding nailheads to a cornice,
that will give you the added WOW factor you're looking for.


The cornice was covered with a dupioni silk fabric. 
 Next was to draw the design for the nail heads onto tissue paper,
 and then transfer the design onto the cornice.
Each nail headed was then pounded in individually.
This took some time, but was well worth the effort. 


I ordered the Fleur-De-Lis wood appliqué from

It comes unfinished.
 It was painted to match the finish of the nail heads.
This appliqué was 9" tall. 
It comes in various sizes which you can view Here.


Here is a close up of the deatil.
It was a sunny day so the photos are not top quality.


The kitchen is attached to the great room,
so the window over the sink
 needed to have a bit of WOW factor also.

I chose two coordinating fabrics
 that worked well with the solid fabric in the great room.

The window treatment had some extra "Bells and Whistles".
The jabots was made out of an embroidered silk fabric.
Each jabot was attached to the arched cornice
 with wooden medallions.
 Pretty tassels hung from the end of each of the jabots.

The cornices arched shaped helped to frame the windows
 beautiful view of the lake.


I loved the challenge
and the client LOVED her new window treatments!

I'll be linking up to.....

Thursday, August 4, 2011

Designing a Window Treatment....

Thought I would share with you a drapery job,
that I recently completed for a client.
Here's the naked windows that were in need of some draperies.
My client's house is decorated with an Asian flair.


I came up with the perfect window treatment design
to compliment her design style.
Take a look....


The asymmetrical design  framed the fireplace.
I choose two neutral tone fabrics for the window treatments.
One of the fabrics was a solid, with a crinkle texture. 
The other fabric had  tone on a tone leaf design.   


The jabot had a handmade tassel that I designed and made. 
It was the PERFECT accessory to dress up this window treatment.
To make the tassel I first cut a square from a piece of wood.

I have learned to use many "MANLY TOOLS"
 over the years of constructing window treatments. 
After the square was cut,
 I painted it with the same color as the fabrics,
 and  then wrapped it with some  decorative black thread. 
 I added a tassel that I made from some speciality yarns. 

What do you think?
I even surprised myself at how it come out!!!


It's always exciting to see the transformation take place.
My client was thrilled and I couldn't have been happier.

Next time you are dressing a NAKED window in your home,
take a look around your room.

 Think about how you can dress your window
 with a style that compliments your rooms decor.

I'll be linking up to...

Tuesday, July 26, 2011

On the Road Again... A Wonderful 51st. Birthday....

I've been on the road for the last three weeks. 
It's baseball season.
When you have an 18 year old son who plays travel baseball,
 there isn't time for much else.
This past weekend we headed for Cincinnati and Kentucky.


While we were away it was my 51st birthday.
It was the perfect day.
I got to see my son play at the University of Cincinnati.

If you're a mother of a son who plays baseball,
it's a mother's dream to see her son play on a field like that!


We had the perfect seats, right behind the backstop.
It was hot 100 degrees, but I didn't mind.
We just sat there with a cool drink and relaxed!


Batter Up!
Can't believe this is the same little boy I watched play
Little League Baseball.


Time Flies!


Got to spend the day with two of my favorite guys!


My Hubby....


And my youngest son!


A  PERFECT way to spend a
 PERFECT DAY!

A Topiary With a Little Birdie and Nest....

Summer is busy.
When time is limited,
I'm always looking for a quick decorating project.

My kitchen window needed something.

So here's the finished project.


It all started with this clearance vase from Michaels.
I had picked it up last season,
knowing it would be perfect for something, someday!


Now that I decided what I was going to create,
I headed over to the craft store
to pick up some items.

All I needed was some styrofoam,
spanish moss, a bush of ivy
and a little birdie in a nest.


Off to the back yard to find a stick
 for the stem of the topiary.
Luckily we had a rain storm,
so there were lots of branches laying in the backyard.

I put crammed a piece of styrofoam into the vase.
Next step,
 push the branch into the styrofoam. 
 I added some glue to the branch
 before putting it into the styrofoam.
Next, cut various lengths of ivy using wire cutters.

Once this is complete,
 glue (with a hot glue gun) the pieces of Ivy to the top of the branch.  Arrange the ivy so that it is in the shape of a ball.

While out searching for the larger branch,
I had picked up a bunch of small twigs.
I arranged them around the stem
 and secured them with a piece of jute twine.


 I added some ivy to the base.
Now time to nestle the little bird and nest into the ivy.


I embellished the nest with some small twigs.


All done!


It's perfect  sitting by the window.
It was quick easy and inexpensive to do.

Got a little bit of time?
Try this. 
 I think you'll love it also!

I'm linking up to the following....

Sunday, July 17, 2011

What To Do With Graduation Photos...

What have I been up to?
Here's a guess....


At our house, June, July and August are busy months
 with lots of baseball games.
  I'm headed back home from a nine day baseball tournament in Georgia.

Next stop is Cincinnati!

It's a crazy summer,
but we love every minute watching our youngest play.
I don't know what we will do with all our free time
when he graduates next year.

We have also had some graduation parties to attend  this summer.
I never buy greeting cards from a store, I am just to cheap frugile.

Have you ever wondered what to do with those graduation photos you recieve with the invitation to the party?


  I always feel guilty throwing them in a drawer.
I never know where to put them.

Well here is an idea.
Make a one of a kind card to give the graduate. 
Just slip a gift of money into the card.
They will love it!

Here's what I came up with...


Now I don't have to feel guilty about the picture.


Another tip....
I always add a special touch to any envelope I use.
Embellish the bottom with a piece of scrapbook paper.
Just tear the paper and glue on.


It's the little extra things that can add just the right touch.
Do you have an upcoming gradution or birthday party?

Next time try this idea.
It's bound to put a smile on the face of the person
 who opens the card.

I'll be linking up to the following....

Related Posts with Thumbnails