Showing posts with label fabric. Show all posts

Tuesday, September 27, 2011

Sweet Dreams ......

What do I like most of all about my "REAL" job?

The opportunity to be creative.
I love to create.
Being able to  be creative while working at my
"REAL JOB"
is something that I am very fortunate to be able to do. 

Here is one of my absolute favorite rooms I created for a client...


This was done for one of my favorite client's daughters.
I have done almost every room in their beautiful house.
She is a client who I now consider a friend.
I always enjoy having her call with the next project.


I designed and made everything except the bedspread.


The canopy with crown required a total of 40 yards of fabric. 
We used a soft ivory and pale lavender dupioni silk
for the  panels and crown. 
 Between the ivory and lavender silk
we used interlining to make it more luxurious.


Lots of beaded trim was used to embellish the crown
and leading edge of the panels.


The pillows were made from an additional bedspread and coordinating fabrics.
 

In addition to the bed,
 I designed a window treatment for the large bay window.


The cornice was covered by shirring on the lavender silk fabric.


I added a triangle swag edged with the beaded trim.
The swag was attached by using two decorative drapery finials.


The dressing table needed a bench.
She wanted it to be like an upholstered piece of furniture.
I had never made one before,
but what the heck,
 I would give it a try.....


Not bad for a first attempt!

I decided to make a plywood box  with a top on it.
Then I just covered the entire box with the fabrics.
 I added a thick piece of foam on top,
covered it with fabric and added some buttons.


The other day I got a call from my friend "the client" ...
Her youngest daughter just graduated
and decided to live at home while going to school.
She wants a room just like her BIG sister....

Can't wait to get started!

I'll share photos when the job is complete.

I'll be linking up to....

Friday, September 9, 2011

A Lampshade Facelift....

Do you have a wonderful lamp 
that has just an ordinary Lampshade?

You can change that with some fabric and trim.

My friend Shelly had that exact problem.

Take a Look...

Nice Lamp..... Ordinary Lampshade... 


It took about an hour.
What a face lift!


I searched my drapery fabric stash and came up with this combo.
I knew there was a reason I save all these small scraps.
Two different fabrics and three different trims,
gives this lamp a one of a kind look.


I love how the light shines through the fabric.


The loop trim finished off the lower edge of the shade.


Here's another one of shelly's "not so special" lampshades.

The lamp was really cute...
The lampshade not so much....


Here's another fabric and trim combo.


Take a closer look...


I delivered them to Shelly and she smiled!
She has a beautiful home.


It was the perfert touch
for the lampshade....


She had two of these lamps and I covered both lampshades.
Here's the other one....


I love the way it reflects in the set of mirrors....


Here's the other lamp,
sitting in it's new home.


Do I have you thinking
about changing any lamp shades in your house?

You can do it!


You'll be suprised how easy this can be
and the final result will give you a one of a kind look
 that you will LOVE.

I have enterered these one of a kind lampshades int the
"Crafting with the Stars" contest. 
Stop by and Check it out.

I'll be linking up to....

Thursday, August 25, 2011

Add Some Nail Heads to a Cornice...

Looking to add some extra detail to a window treatment?
Recently I completed a drapery job for a client.

Here's the before photo...


And Here's the completed job...


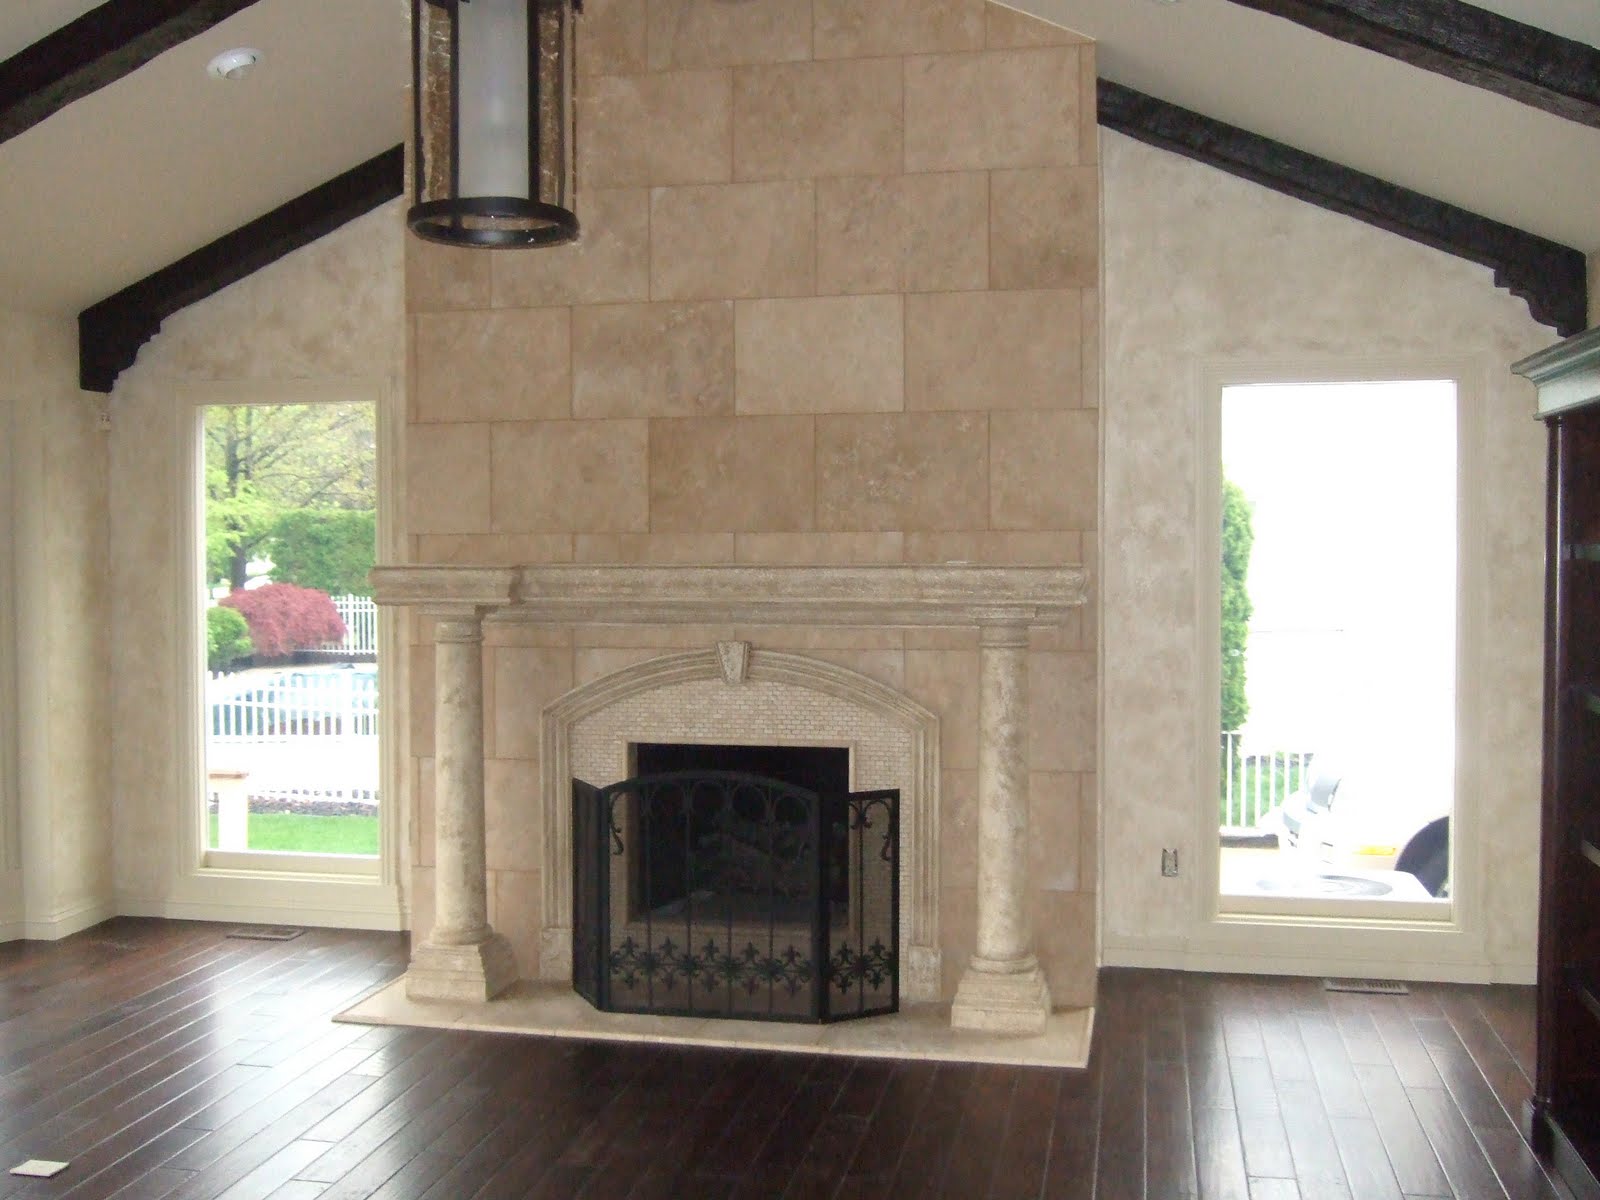
The great room had just recently be redone.
I was called in to soften the room with fabric.

What to do?
It was a large room with some heavy elements....

I designed window treatments and custom pillows
that fit into the room perfectly.


Here's another view of the large window that needed
some accessorizing with fabrics.


The windows on either side of the fireplace
 were flanked with window treatments
 that had some extra special detail.

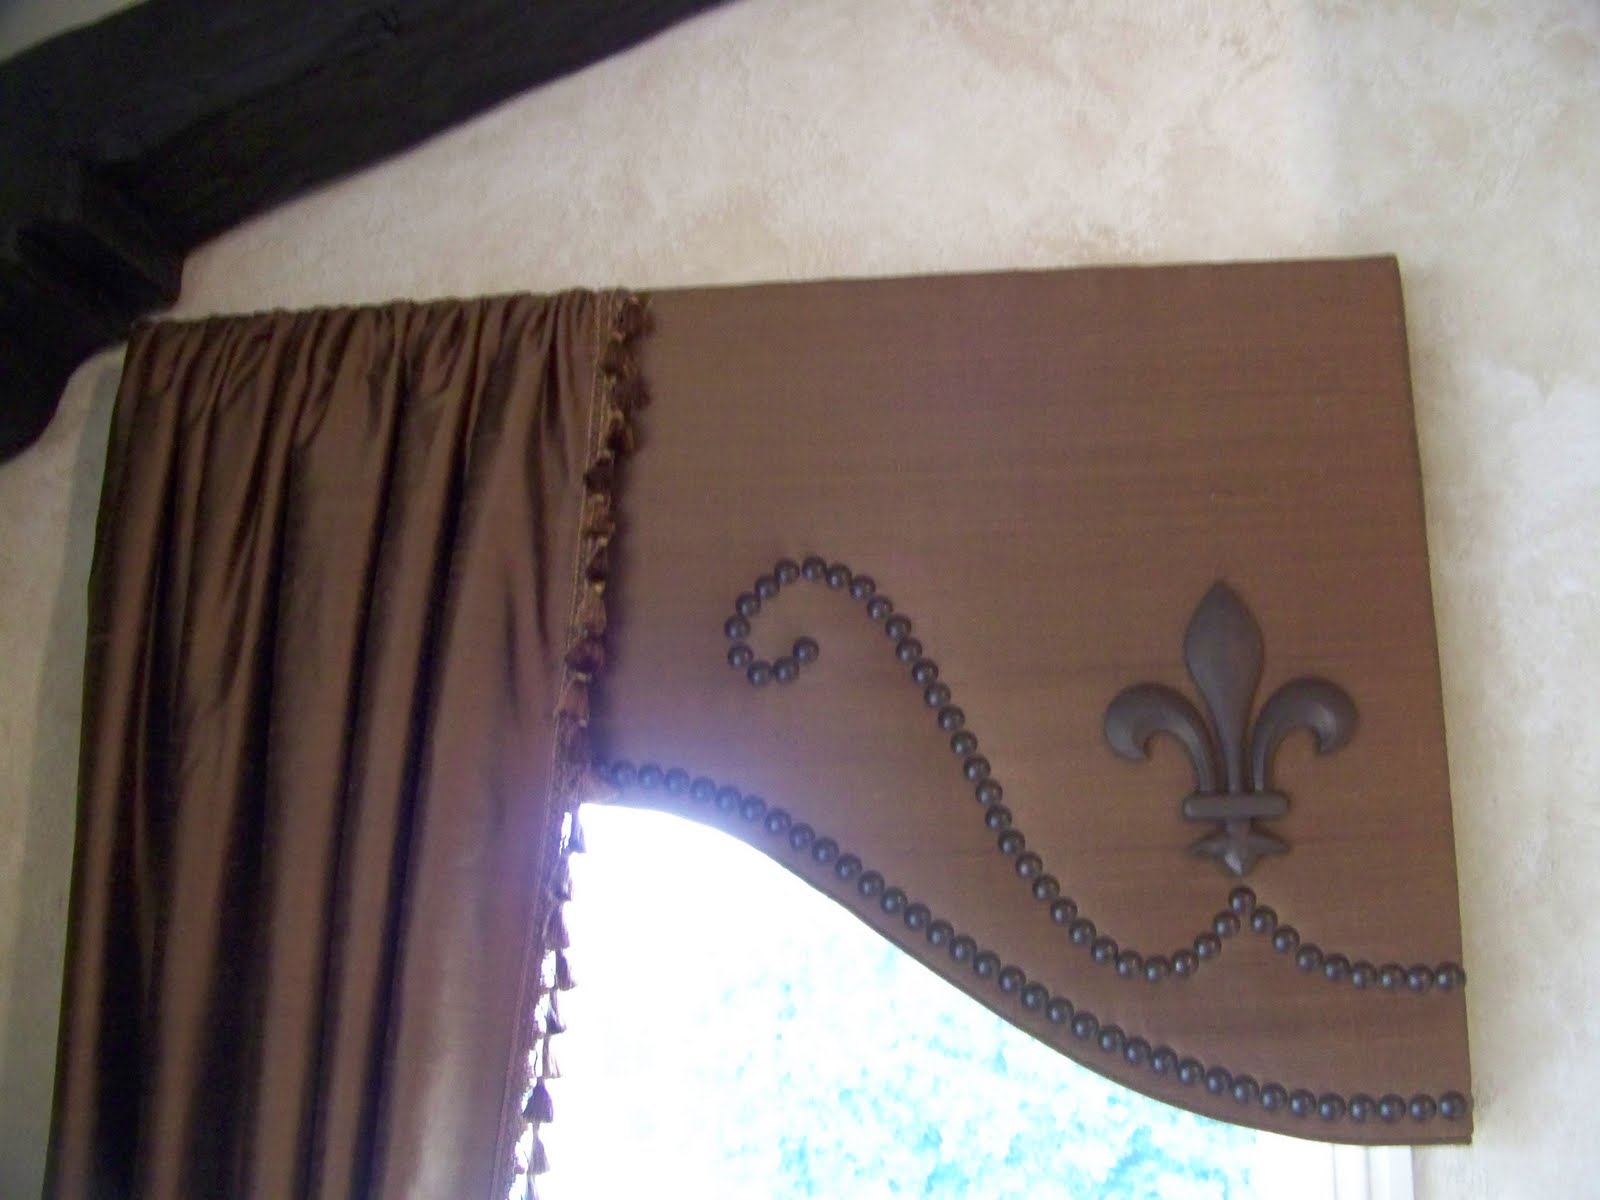
Sometimes just by adding nailheads to a cornice,
that will give you the added WOW factor you're looking for.


The cornice was covered with a dupioni silk fabric. 
 Next was to draw the design for the nail heads onto tissue paper,
 and then transfer the design onto the cornice.
Each nail headed was then pounded in individually.
This took some time, but was well worth the effort. 


I ordered the Fleur-De-Lis wood appliqué from

It comes unfinished.
 It was painted to match the finish of the nail heads.
This appliqué was 9" tall. 
It comes in various sizes which you can view Here.


Here is a close up of the deatil.
It was a sunny day so the photos are not top quality.


The kitchen is attached to the great room,
so the window over the sink
 needed to have a bit of WOW factor also.

I chose two coordinating fabrics
 that worked well with the solid fabric in the great room.

The window treatment had some extra "Bells and Whistles".
The jabots was made out of an embroidered silk fabric.
Each jabot was attached to the arched cornice
 with wooden medallions.
 Pretty tassels hung from the end of each of the jabots.

The cornices arched shaped helped to frame the windows
 beautiful view of the lake.


I loved the challenge
and the client LOVED her new window treatments!

I'll be linking up to.....

Thursday, March 31, 2011

A Lampshade Re-Do for a Friend....

Last week I had the opportunity to visit
with my good friend Sharon. 
Sharon has a wonderful blog,
 During our visit I helped her out with a new cover for her
NAKED LAMPSHADE...


The lampshade was for a wonderful antique lamp
that Sharon's husband had purchased for his office.
When sharon asked him how he wanted the shade covered,
this was what he designed!


Do you like the fringe he designed?


Fist step was to line the shade. 
  I used a muslin fabric.


I Just hot glued everything.
  It looks like a BIG mess I know, but don't worry.
It will look a lot different once it is completely covered.


I then added bias tape to the inside edges to cover up any seams.


It's begining to look a lot better. 
 I was quite pleased with how the lining came out.
Sometimes I suprise myself!


I found this website for burlap HERE
 and suggested to Sharon that she order it.
So that's what she did.


Sharon had purchased some black gimp for the edges.


 Can you tell that my glue gun get a real workout! 
 It's a mess.
I guess that's a sign of a true crafter...

You can see how much neater the inside of the lampshade is
 with the bias tape covering the edges.


It was that easy. 
We had a great time visiting and also got a project done.
 Here's the new lampshade adorning the antique lamp.


Sharon's husband called to say thanks.
 He really liked the lampshade.
I think he likes it even better than the design he had in mind!


I also designed and made a new window treatment for his office.
Thought I would share it with you.


Next time you have an old lampshade
 or even a NAKED one,
 think about giving it a new look. 
I'll be linking up to the following sites...

Related Posts with Thumbnails