Showing posts with label Baby. Show all posts

Wednesday, January 26, 2011

A Baby Photo Album to Treasure...

I've been sharing with you
 in my three previous posts the shower gifts for
Baby Isabella.
She arrived on Christmas Day
so I had to make this little bundle of joy
 a gift for her Christmas arrival.

What better than a little book to store some precious photos.
I started off with an inexpensive photo album
 that I actually purchased at the dollar store.

Check out my post HERE showing what album I used.

I made a matching gift bag to put the album in....


Lots and Lots of PINK!


Had to have some Bling.
Why not add a few rhinestones....


I purchased a JUMBO pack of rhinestones at JoAnns.  
  The package of rhinestones had all different shapes and sizes. 
It was $19.99,  but I NEVER buy anything without a coupon. 
The final price as $9.99 which was well worth it!


I used a large gold safety pin to hold the ribbon on and added another rhinestone shaped like a flower for an embellishment.
I topped that off with a pink pearl!


The scarpbooking paper I used was left over
from the "Baby's First 12 Month Book" I made. 

 I always save my scraps. 
 They are perfect for these kind of projects.


Here's the inside of the book....


I added a bible verse to the first page.  
If you became a follower and emailed me,
I sent you this printable.

Want a copy?
Follow me and send me a comment.
I'll send it right out.


The matching bag with lots of embellishments and the same verse.


I love the look of adding the daises.


This was another project  I really enjoyed doing. 
 It gave me the opportunity to use lots of girly things.

I'll be sharing this idea at the following links.... 


Tuesday, January 18, 2011

Baby's First Year Book....

I've been wanting to share with
 the you the baby book I made for my new
Great Niece Isabella.
It's a Baby's First Twelve month book.
I have lots of photos to share with you.
 
Lets start with the cover...


I printed out her name and the title on vellum paper.A few rhinestones added some bling.


Lots of pretty pink ribbons were tied to the binder rings.


Here's the inside cover and the first month.
I used one of the packages of scrapbooking papers from JoAnns. 
There were lots of paper with glitter on the paper.


A growth chart to keep a record of the baby's monthly changes.
I made the chart up myself. 

Want  a copy?

I'll tell you at the end of this post how to get it.


More BLING!


Some texture was added
 by wrapping a pretty yarn around the
 "Baby's Schedule Chart".


This was a paper I found at a store.
I needed quite a few of these and they didn't have enough.

I just made copies for the additional ones I needed.
I embellished it by adding a sticker that said "Baby" and sewing a Zig Zag stitch around the edge with my sewing machine.


Month one...


Month Two and Three...
I added a smaller page for jourling each month.


Each month has a number for the month. 
 I printed the number out on colored scrapbooking paper.
I then  cut it out with a punch and glued it to a white disk with a silver ring around it. 
 I found these at the office supply store.

Want a copy of the numbers?
Read on.....


I love using silk flowers. 

Here's a way to save money...

Go  to Michaels and purchase a bush of flowers
and use them individually. 
 It's much less expensive than going to the scrapbooking store.


Month four and five...


Don't you just love gerber daiseys?


Month Six...
I love adding pockets to the pages.
It's a great way to store special baby items and photos.


Month Seven...


Pretty Buttons and rhinestones embellish the page.


More pages I copied and added to the book
 to allow for recording special memories.


Stop by later this week to see the rest of the book, 
 months eight through twelve.

Now if you want a copy of numbers, sayings, cover words and growth chart here's how you can get one.

Just become a follower of my blog.
Please leave me a comment letting me know
 that you have signed up to be a follower.

 I will email the word documents to you.
Are you already one of my favorite followers?

Just leave me a comment letting me know you follow
 and I would love to send you the file.

This is a wonderful gift to make for a special baby.
I'll be linking up to the following creative sites...

Thursday, January 6, 2011

A Coat Fit For a Princess....

The month of December was filled with so many wonderful events.  One special event was my niece's baby shower. 
 She was having a baby girl and I could hardly wait to make something special and very GIRLY!
I headed over to JoAnn Fabrics.

Look what I found.... And it's Leopard!


I found a polar fleece fabric in a Berry color with matching lining that had a flannel backing.
  That will keep the "Little Sweetie" warm. 
 The best part is the leopard fur.


Here's the pattern I selected. 
You can see more information about the pattern HERE.


 Being that I had two boys I never got the chance
 to make any sweet clothes for a girl.

 I could hardly wait to start sewing it.


Ready to see the finished coat?

 I just loved the way it came out
and could hardly wait until the shower to give it to her.


The pattern had pink rosettes but I thought the cream rosettes would look nice with the red. It made it look much more like a holiday coat for the Christmas season. 


The pattern called for snaps to close the coat. 
 I just didn't want to put silver snaps on the coat. 
 I wanted it to have a "couture look". 
 Don't you just love the Internet? 
I googled "How to cover snaps with fabric"

 BINGO  I found lots of info.

 I used THESE directions.
  It worked great and it was pretty easy to do. 
I just had to take my time.


I think this gives it a finished looked
 and makes it look like a custom coat.


This was a fun project and my niece loved the coat. 
 Little Baby Isabella Maria was born Christmas Day.
  What a wonderful Christmas Gift. 
I can't wait till next Christmas when she wears her new leopard coat. I also make her a "Baby's First Year" Book. 
The book was definitely girly and had lots of glitter. 
Can't wait to share that  project with you in my next post.
I'll be linking up to....

Monday, March 29, 2010

An Easter Creation for a Baby....

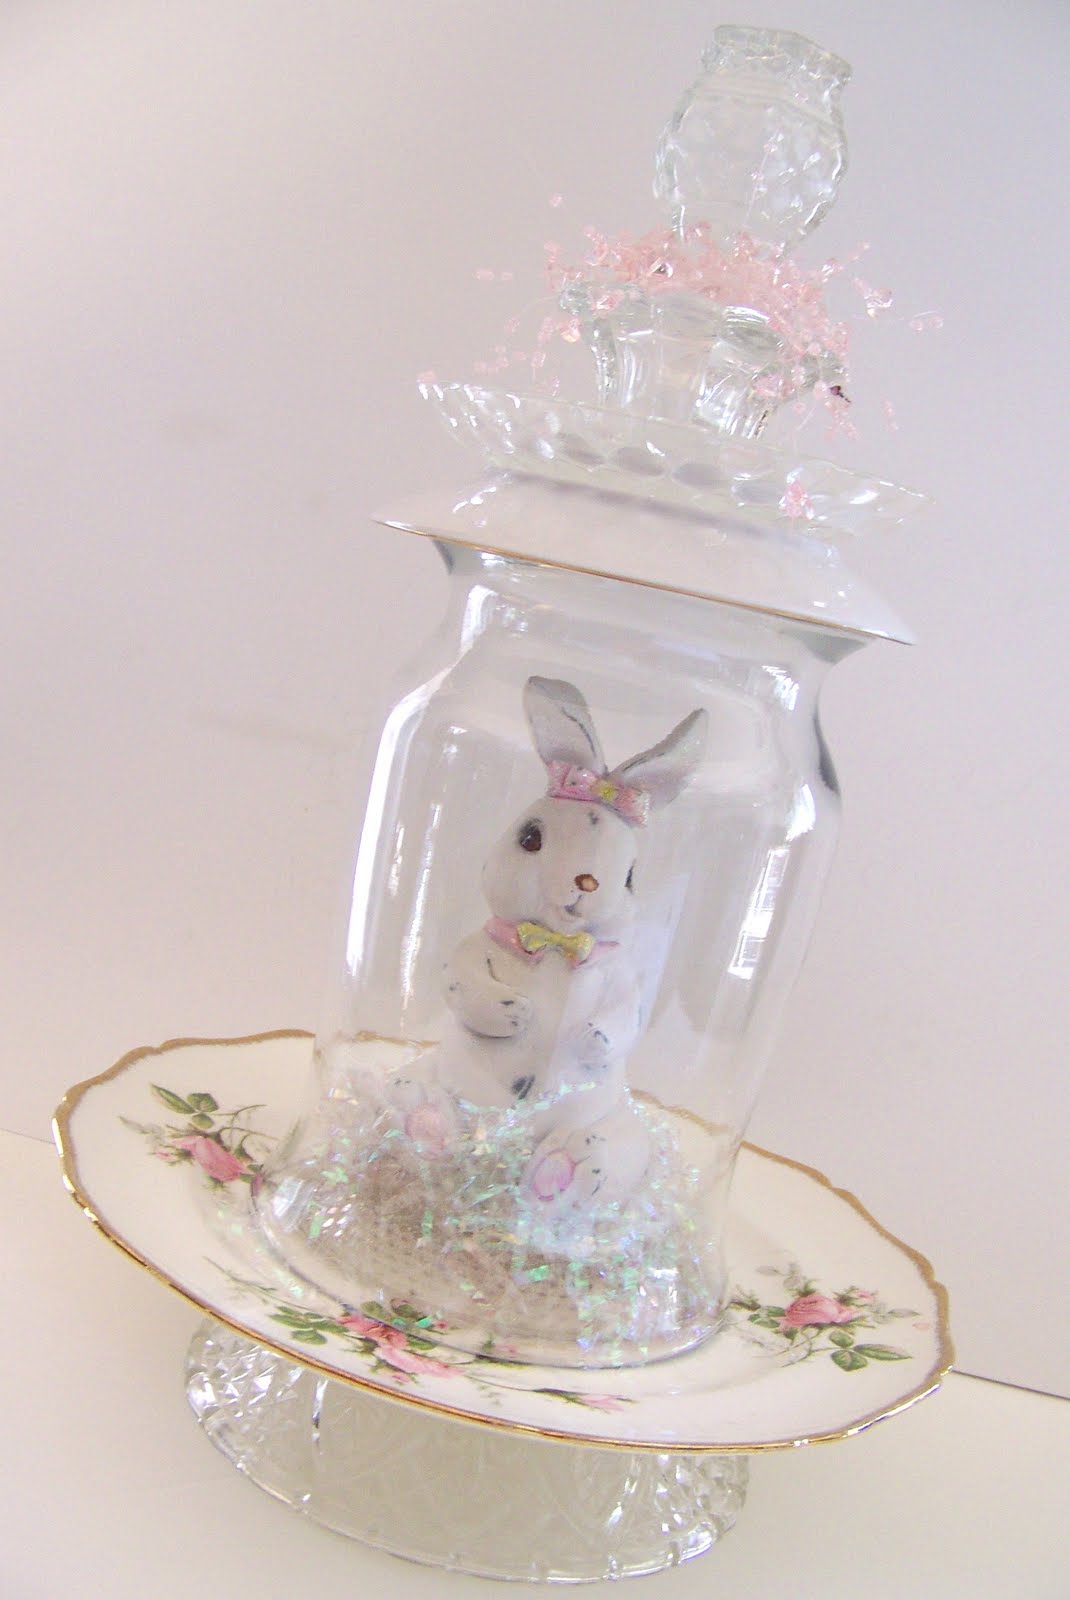
With Easter right around the corner, I wanted to make a few items for the display at the “Tea Party Castle”.  Even though I made them with Easter in mind, this would be the sweetest gift for a baby shower or for a baby’s nursery.  Here’s my latest creation…..


I added some glitter to the bunny and perched it upon some iridescent shed. That added just a bit of twinkle.I had picked up these plates at a thrift store. There was a set of 6 plates. Originally I was going to keep them for myself. I was thinking they would be wonderful for a girlfriends luncheon, but they were perfect for this project. They have a gold rim and I just love the pink rose buds.


I searched through all my pieces of glassware and found some items that I thought would be just the right combination for the top of the cloche. I love playing with the different combinations of plates and glass items. The possibilities are endless.


I added four different glass pieces to the top of the cloche and then finished it off by adding my favorite pink beaded garland.


Two different plates were used for the top. I combined a china white plate and scalloped glass plate.


I was in a creative mood, so here’s another combination I’ll share with you …..


I used a lid from a candy dish to top this cloche off!


Since it’s Easter I figured I would add a few new tassels to our display. I made a few of each and have added some for sale at my Etsy shop. Stop by HERE.  If interested,  I will ship them out priority Mail so that they will arrive just in time for Easter!


Can you see the crystal hanging from the bottom?


I added a wonderful LARGE round crystal that just peeks out from the bottom of the tassel.


I made a bunny tassel for my dear friend Shelly.
Here's the matching gift bag I made to put the bunny tassel in.


Sticking with the baby theme,
I also created a pretty tassel for the nursery.


Lots of pretty pink ribbons, mixed in with a wonderful flocked cream ribbon.


I hope I’ve inspired you to try and create a “one of a kind gift” for the next baby shower gift you need.
I'm sharing this post with the following links.  Stop by and see all the creativity...

Related Posts with Thumbnails