Happy New Year!
Let's get the New Year started
with my latest project that adds a bit of
BLING...

A few years back I was at a drapery client's house. As I walked through her garage I saw a very large brass chandelier laying in the middle of the floor. I asked if she was installing a new lighting fixture and she remarked that her mother had given her the light fixture, but it was to large for her foyer area.
She then quickly asked if I would be interested in it.
FREE of CHARGE.
All I had to do was move it.
I couldn't get the word YES out of my mouth quick enough!
I didn't realize how heavy it was and how much work it would be to take down the fixture we already had hanging from the ceiling in our two story foyer.
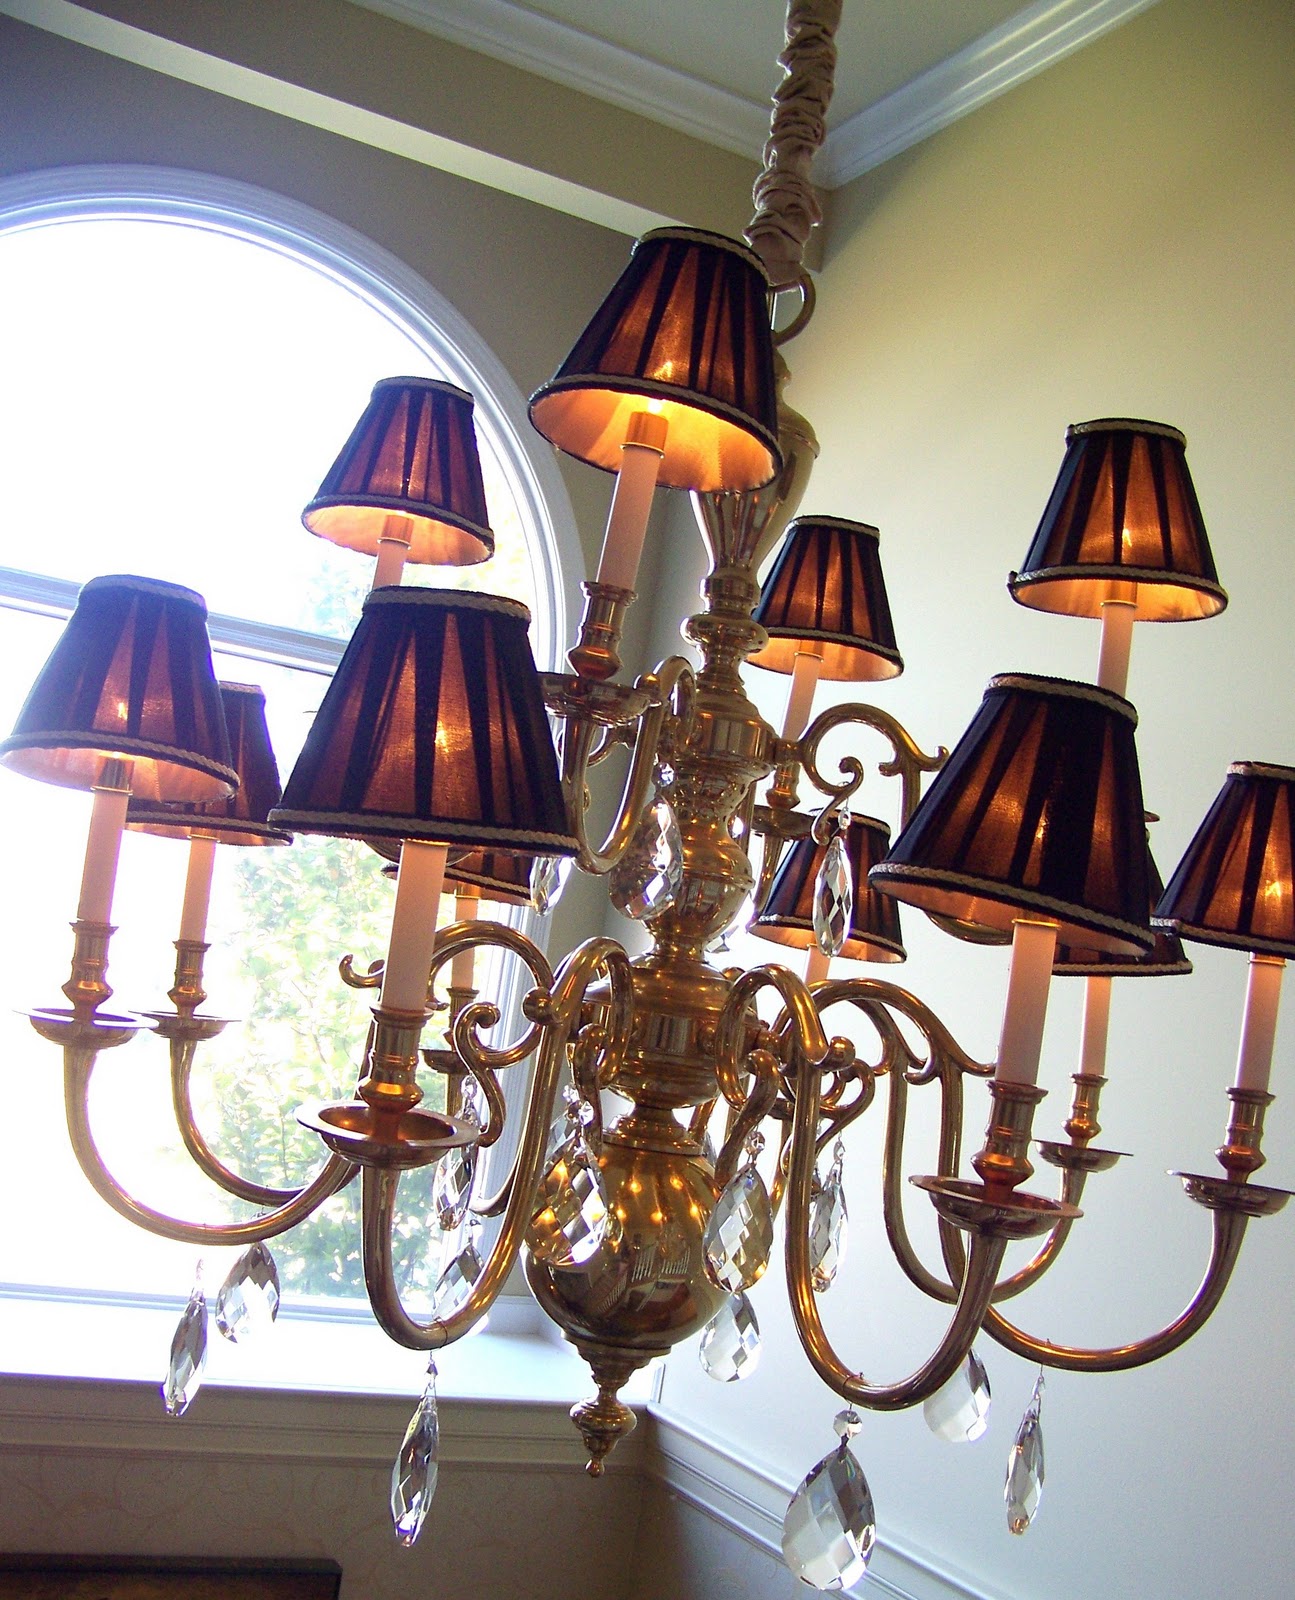
Here's what it looks like once the installation was complete.

The chandelier did not have the black shades.
I found all 12 of them at one Marshalls.
Can you believe that luck?
I was doing the Happy Dance that day!
I also made a fabric sleeve for the chain out
of some left over silk drapery fabric I had.

I loved the way the light looked
EXCEPT...
I had always wanted crystals on a light fixture.
What's a Girl to Do?
I headed right over to the Internet and Googled
"Crystals for Chandeliers"
and HERE is what I came up with...
3.75" Crystals with Magnets attached.
Only TWO Problems...
1. Each crystal is $12.50 and I need 20 of them.
That would be $240.00!
2. The chandelier is brass and oops...
brass does not work with magnets.
Back to the internet.....
BINGO!
I found this wonderful site called "Cristaler".
These are the exact cystals I ordered.
Did you notice the price?
$1.39 Each
That's right, it only cost me $27.80 plus shipping.

They quality is amazing.
I was a bit worried that they would be plastic for that price.
NOPE, all glass and the cut is wondeful.

They have a wonderful prism color.
How did I attach them?
I used a very fine gauge of brass colored wired
and wired them to the chandelier.
Since the light fixture is two stories up, you can't even tell.
I also added more crystals to my bedroom ceiling fan,
which you can see HERE.
I matched the color wire to that fixture and you can't even tell that I wired them on.

I couldn't be happier!
The light reflects off the crystals a they just sparkle.


These inexpensive crystals
added lots of BLING!

I'll be linking up to the following sites....
Pink Saturday
Check Me out Saturdays
Weekend Wrap Up Party
Saturday is Crafty Day
Sundae Scoop
The Sunday Showcase
Check Me out Saturdays
Weekend Wrap Up Party
Saturday is Crafty Day
Sundae Scoop
The Sunday Showcase
Metomorphosis Monday
Market Yourself Monday
DIY Showoff
Marketing Monday
Made By You Mondays
Marketing Mondays
CraftOManiac
Just Something I Whipped Up
Market Yourself Monday
DIY Showoff
Marketing Monday
Made By You Mondays
Marketing Mondays
CraftOManiac
Just Something I Whipped Up