Wednesday, November 25, 2009

It's beginning to look a lot like Christmas....

...HAPPY THANKSGIVING...
I’ve been busy this week getting ready for Christmas. Unfortunately it was not for my house, I have been decorating for a few clients. I wanted to share with you some of my creations…
I’ve always been a traditional Red & Gold girl. I never thought I would like a Christmas tree decorated in white, but once I finished this one I was hooked on the color theme. Here was the tree before the transformation....


Now let me  share with you the completed transformation....

This tree just shimmered and had lots of bling. By the time I was done adding all the glitz the tree itself can barley be seen.


All the embellishments were covered with glitter. By the time I was done I had glitter all over me. My face was sparkling!


I added a wonderful glittered fern to the top for the tree topper.


I used three different wired ribbons. One was a gold glittered ribbon and another was a sheer white with  a gold design.  The third ribbon had gold glittered snowflakes.


I love using the new plastic bulbs. They don’t break and when it’s time to pack up all the decorations you can just THROW
lightly toss them in a box! It makes the clean-up much easier.
 Thrifty Tip #1....  The dollar tree is now caring these plastic bulbs in many different colors.  Unfortunately I did not discover them there until I had already finished decorating for my clients. I also found this nifty wide gold netting that came on a large bolt. I added tuffs of it throughout the tree.


Pewter glittered eucalyptus adds just the finishing touch to give the tree some texture.


  Thrifty Tip #2 ....  No need for an expensive traditional tree skirt. I just used about three yards of gold lame’ fabric  that was on sale and wrapped it around the base of the tree.


 No sewing needed, just tuck under the cut edges. You’ll be the only one who knows!


After finishing the tree it was time to start decorating the fireplace mantel that was located in the same room as the tree. You guessed it, more white and gold glam!


I used the same ribbon and bulbs as I used to decorate the tree.


These gold glittered ferns were so cool I had to use them. 


I used some large gold glittered ball ornaments to top off theses mercury glass candlesticks.


The mercury glass was the perfect with this color theme...


The same gold glittered fern as the tree topper was used to embellish the mantel. 


Three different types of beaded garland were hung from the mantel.  This is one of my favorite ways to add a unique look.


Here's a complete view of the tree and mantel.


I am hoping that my friend Linda’s family will enjoy the Christmas tree many evenings this Christmas season. It’s that what Christmas is all about. Celebrating the birth of our Lord and Savior and creating memories with those you love. Come and visit this week and see how I transformed the spiral staircase into a winter wonderland. 

I’ll me linking up to some wonderful sites this week. Come and visit….


Wednesday, November 18, 2009

YIPPIE...Special Delivery


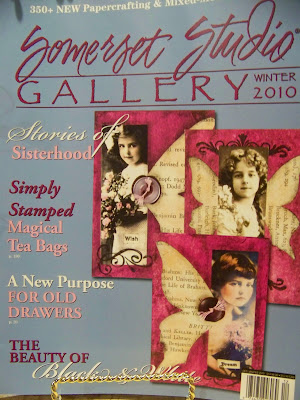
Oh how I love when the mail comes and there is a special delivery.Today when I saw the package,  I quickly ripped open the wrapper.  I knew exactly what was inside. It was the new addition of Somerset Studio Gallery.


It’s the winter 2010 issue; can you guess why I got it early? Yep, one of my creations was in the publication. I quickly flipped the pages, and there it was on page 83. I submitted this for the issue which has a feature about “Sisterhood”. I sent the handcrafted design way back in February,  where I posted about it HERE. A few months ago the editor contacted me to let me know that they were going to feature it in the magazine. You can only imagine the “Happy Dance” I did when I read the email. Once again my husband and two boys thought I had lost my mind! The photo was taken years ago one Easter morning with my mom, two sisters and me. It’s the same photo I used HERE in my office makeover.


This is an easy project.  All you need to do is purchase an inexpensive frame from the discount store or even thrift store.  Remove the glass and embellish a photo with some vintage buttons, ribbon and a little bit of paint. With a bit of creativity you will have a treasured creation. I love making these for gifts. I will soon be getting my design back from Somerset and I have the perfect place to display this design that I will always treasure.


Next time you’re looking for a one of a kind
“Creation From the Heart”, think about using an old treasured picture and an inexpensive frame to create that special gift for a loved one this Christmas Season.   Looking for other creative ideas? Come and visit some of the blogs I'll be linking up with...
Transformation Thursday


Wednesday, November 11, 2009

Turn a photo into a keepsake....

My oldest son graduated this year and we received a stack of graduation invitations in the mail. Many of the cards had a wonderful graduation photo of the graduate. For years I never could figure out exactly what to do with the photo. After displaying them for a time, I would put them in a drawer and eventually I would throw away. Knowing how expensive the photos were, I have always felt guilty about doing this. I now have an easy way to transform the photo of the graduate into a keepsake....


Taking the photo and incorporating them into the gift card will make your graduation gift unique and something that the graduate will treasure.

Now, I no longer feel guilty about discarding the photos. I have had many graduates tell me how much they enjoyed the card that I made. This also makes a wonderful card to hold a gift of Money.


Even boys enjoy getting these cards.


 What high school student wouldn't like to get a picture of themselves!


These are some cards and journals I made for some of the many graduation parties we attended this summer.


Next time you receive a graduation or birthday invitation with a photo, think about how you can transform the invitation into a one of a kind "Creation From the Heart". I'm linking to the following wonderful sites.  Stop by and see all the creativity at:Transformation Thursdays.... Thrifty Thursdays ....

Metamorphosis Monday ... So Very Creative Party ... DIY Day. 


Monday, November 2, 2009

A Floral Creation....

I had a client last week who wanted to place a large wreath above her fireplace mantel. She had seen some of the wreaths I had made for myself and wanted to know if she could hire me to make a custom wreath for her. I have never made a wreath for a "paying" client and was a bit worried. She assured me not to worry because she knew she would be happy with what ever I did. I had her fabric swatches, and so I was off to the store to purchase the supplies. That's always the hard part for me, never knowing exactly how much and what to purchase. I am the type of crafter that just creates as I work on the project. So here are the supplies I gathered up....
The grapevine wreath was quite large. I added blocks of floral Styrofoam covered with Spanish moss and attached them with pipe cleaners. This helps to give the wreath some dimension and makes it even bigger. I covered the Styrofoam with silk ivy and then I began to add flowers and more flowers.
Three hours later here is the finished wreath. If measured almost 40" in diameter.
I added feathers and these interesting feathered balls that I found at Hobby Lobby.
The clients colors were black, gold and cream. Her kitchen draperies had a bit of rust color in them. I really liked this black and gold ribbon I came across when searching for supplies.

Well my client came and got the wreath and was very happy with how it looked. That's what I love about creating something. It always amazes me how you can start with a few items and turn it into a one of a kind "Creation From the Heart". Come follow along and check out some other wonderful creations at Do It Yourself Day, Transformation Thursday, Thrifty Thursday, and Metamorphosis Monday

Enjoy and go create something today that will make you smile.

Related Posts with Thumbnails