Tuesday, August 3, 2010

A Special Anniversary Gift....

We were invited to a 25th anniversary party this weekend.  I wanted to make a special gift.  I decided to make a photo album that the blissful couple could store treasured photos from the party.


The photo album was an inexpensive photo album from the dollar store.  Here's what is looked liked before the transformation.


I purchased the scrap book paper from Hobby Lobby
and the ribbon was purchased at Christmas time at Costco.


I love adding buttons to embellish my projects....


This jewel was from a pair of earrings that were a garage sale find. 
 I just love when I come across old jewelry.


A Big pretty satin bow tied the album shut.....


Here's the inside of the book....


The inside had a wonderful bible verse with a pretty button...


The ribbon Bow was attached with another beautiful button...


A finishing touch was a matching gift bag....


I love creating gifts made with special papers.  This is a wonderful project to make for a special gift.  Later this week I'll share with you some albums I made for graduation gifts.  If you love to create you'll be interested in the following giveaways.  Each of the following sites are giving away the new Silhouette crafting machine: 

 Head on over and see how you can win
one of these for your very own.

I'll be lininking up to the following sites....

Creative Share Wednesday

Thursday, July 29, 2010

Turn an Invitation Into a Card.....

I mentioned that we had LOTS of baseball this summer, we also had lots of graduation parties.  I love getting graduation pictures, but somehow they get stuffed in a drawer at the end of the summer and then I feel guilty. 

 How many of these cards have you received in the past?


Here's an idea of taking the photo
and turning it into a graduation card
that will hold your gift for the new graduate...


Next time you receive an invitation, think about turning the picture into a graduation card for the new graduate.
Here's a few more cards I made for the new graduates...


This was my friend Denise's son who graduated this past June...
I have a large box of small pieces of scrap book paper left over from past projects. The small pieces of left over paper work great for this smaller project.  I always try and select paper that coordinates with the school colors.


Here's what the inside of what the card looks like. 


This graduation invitation had three different photos. 
 I decided to use all three. 


I also added a bit of glitz with the rhinestone and iridescent shred.
I love doing girly cards! For the front of the card,  I print off a graduation saying and add a bit of gold paint. 

*Here's a tip... I have different word document files saved on my computer.  Each file has different sayings for different occasions.  When creating the file I type out the saying and then change it up by selecting different fonts for different words.  This creates a more decorative look.  When it's time to create the card I just print out the saying that I have saved.


Here's Andrew's card....


I always use a ribbon that coordinates with the school colors.


A few more creative ideas....


I also love polka dots so this is a favorite. 
 This is my friend Rose's daughter....


There are so many other designs you can make with these photos.  Last year I shared more ideas HERE. 
   I changed this one up a bit also....


I really enjoy making handmade cards.  No matter what the occasion, it's always fun to get a personalized handmade card.  I hope I inspired you to create a personalized card.  Next time you get an invitation think of how you can turn it into a special gift.

I'll be linking up to....

Tuesday, July 27, 2010

A Pretty Treasure....

Where have I been?
Here's a hint.....


It's summer time and summer means lots of baseball at my house. 57 games in the last seven weeks. When you have that many games there is little time for anything else! Boy have I missed blogging. This week brings the end to travel baseball, so I have some time to get re-acquainted with my computer and say hello to all of you who I have missed blogging with.


  I'm always looking for a  "wonderful furniture find" at the local thrift store.  I know that my partner Sharon at the Tea Castle can work her magic and transform the treasure into something a little girl will love .


I had to take a picture of the price.  Can you believe it?
The final cost was $9.99!


Now for the transformation.....


I don't do any of the decorative painting.  I guess I could put the white coat of paint  on the furniture, but as for anything else that is not my gift.  Now I can sew, so I was in charge of recovering the chair seat. After I completed the seat, I decided to add a pretty PINK tulle bow.


Here's the pretty pink flowers that were added to the desk top.


Sharon found the perfect PINK crystal knob for the drawer. 
The funny thing is the knob cost as much as the desk! 
 Sometimes it's the tiny details that make the project perfect.


Friday, May 28, 2010

A Thank You Gift for the Garden....

Can't life at times get so crazy? 
Lately I've been working quite a bit.  I'm blessed to have the work, but  that means I can't always do the fun things I love to do.  One of those is blogging and I haven't had the time to be on the computer.  I miss not sharing with you, so tonight I'm taking a break from work and showing you something I created for a friend.  Our bible study group had  our second annual  weekend getaway at  my friend Denise's cottage. I wanted to take a thank you to Denise for her hospitality.  I knew she loved royal blue, so here's what I created just for her. 


A piece of garden art that she can enjoy in her garden.
I love the way the blue just glistens in the sun light.


I enjoy creating these. 
 Selecting the different pieces of glassware is a lot of fun for me. 
Can you tell what the different pieces are?


Each of the individual pieces of glass
 were found at the local thrift stores.


We had a wonderful weekend together.  We spent a day thrift store shopping which was quite a bit of fun.  I had them all on a hunt for glass pieces for more creations. Here was one of our many stops.
We even did a craft project that I will be sharing with you.


With the hustle and bustle of life, it's alwasy nice to get away and share it with a great group of friends. Hoping you have a wonderful holiday weekend spending time with family and friends.  
I'll be linking up to the following creative sites....
Saturday Nite Special

Wednesday, May 19, 2010

Precious Photos

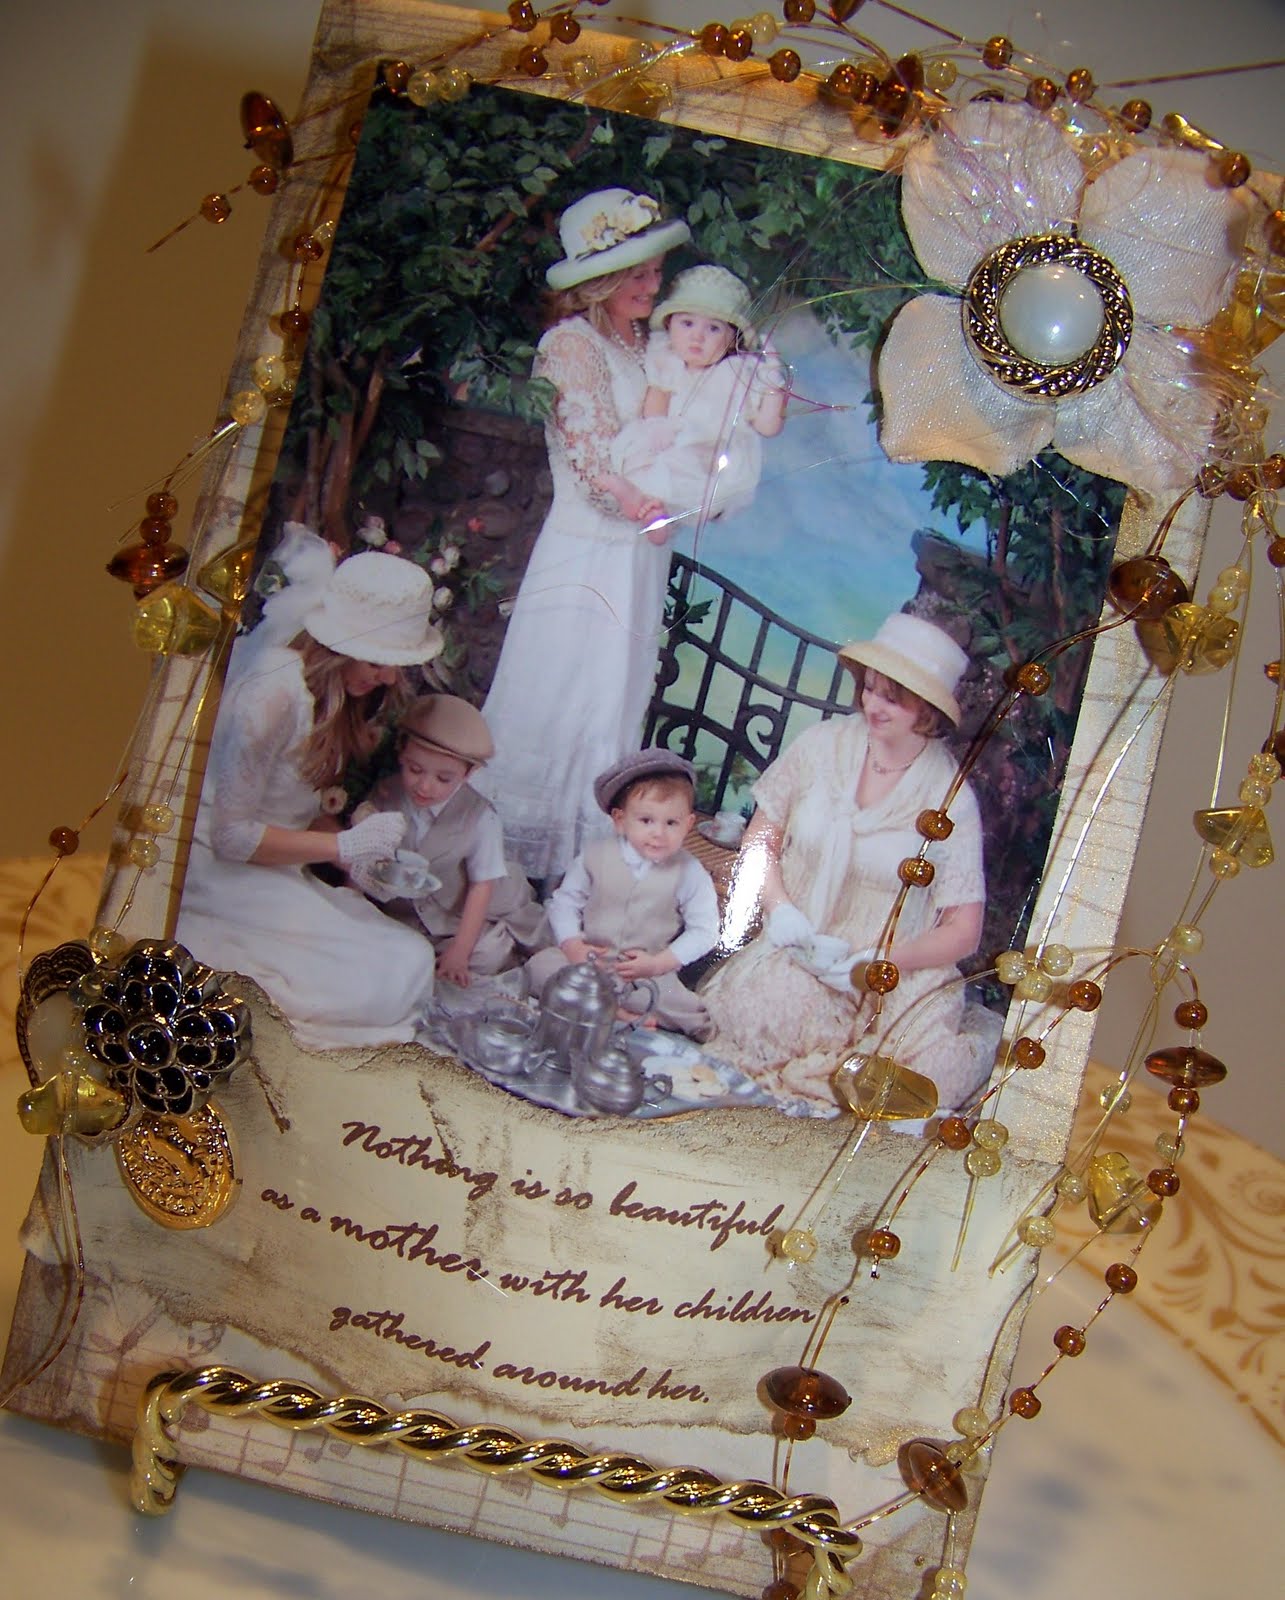
I had to share with you these sweet photos a client asked me to use in one of my latest projects.  When visiting my house, she had seen a cloche I had made with an old photo from when I was a child.  She wanted to give her mom a Mother's Day gift with a photo of her children,  and she also wanted one for herself.  She  asked if I could create something special. 
 Here's the cloche I made for her....


These photos absolutely precious. . 
This photo is of the two sisters with their children and grandmother.


I mounted the photo on some chip board which I covered with decorative paper.  I added some buttons,
a flower and my favorite beaded garland.


I then printed out a saying
 which I thought was perfect for the photo!


Here's the cloche that she had made for her mom.....


Doesn't the white plate go perfectly with the colors of the photo?


I embellished it just like the other cloche.


I have used this saying for many of my projects.....


I actually made the cloche.  It was a vase. 
I turned it upside down and glued on a candle stick for the stem. 
 I added a decorative ribbon, button and heart pendant.
It was an easy project that made a wonderful gift.


Thanks for stopping by.  Hope you have a chance to get out and enjoy the spring weather. 
 I'll be linking up to the following creative sites....

Related Posts with Thumbnails